Sunday, October 30, 2016

Hitting Limits

European Wool Carder Bee IV
It's been a while since I've blogged about macro photography, and truth be told it's been a while since I've held a camera in my hand. It's not the first time I've taken a break, but this one seems to be the longest I've gone without getting "macro withdraws". I've hit a couple of road blocks that have kept the camera in the bag. The first, and I think foremost, is "what's next?". I've been pushing the limits of what I can do with the camera and the subjects I shoot, and I have images that are truly unique compared to what I see in the amateur macro community.

Feeding Chafer Beetle

Feeding Honeybee VIII

Finger Fed Bumblebee

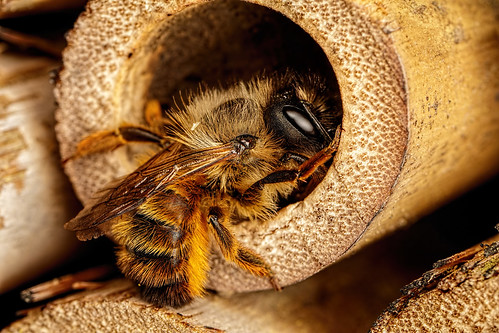
But after a while my gallery seems to just be repetitive, and I don't like taking the same shot over and over any more than you enjoy seeing them. So part of the problem is just an issue of inspiration. What can I do next that's going to keep my gallery fresh? I haven't found the answer to that one yet.

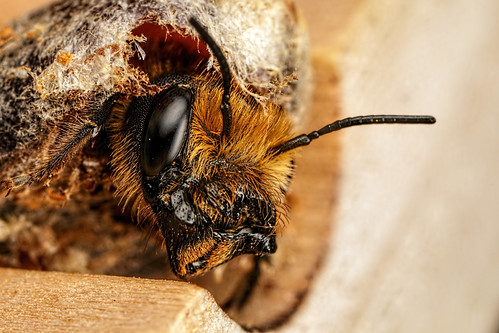
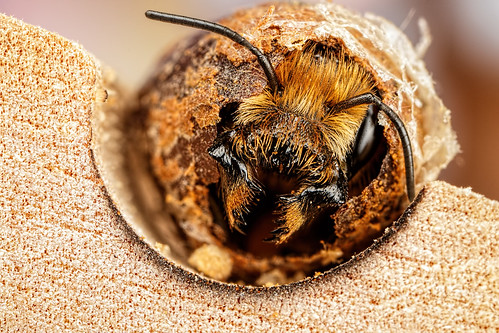
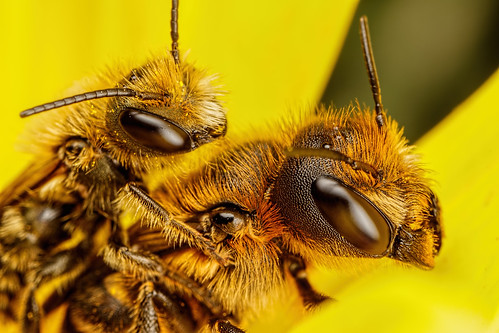
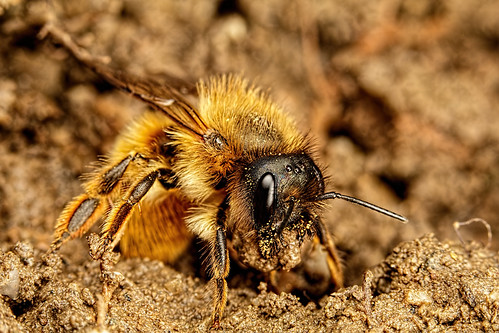
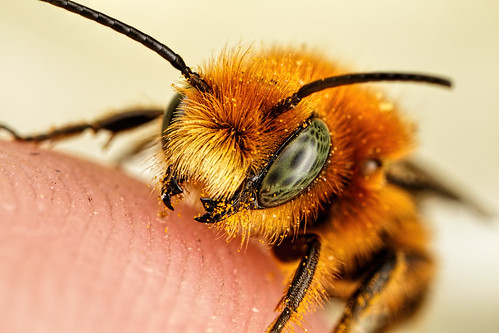
I thought about getting into focus stacking, but then I'd lose the ability to take "action shots" like the images above. Plus I just don't see the challenge in photographing something that doesn't move. Granted I'd get more detail, but I really don't think that detail is a problem even with my "diffraction limited" macro photography:

European Wool Carder Bee VII

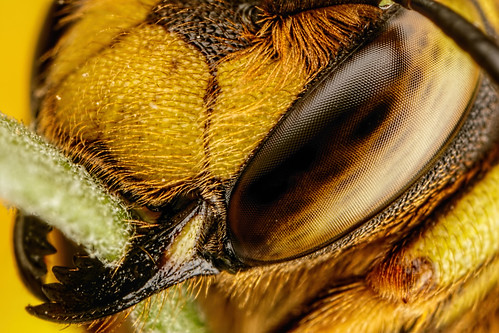
Over the years I've come to realize that the quality of the light I'm using has a really big impact on the level of detail in my images. A lot of texture data can get lost due to light that creates too much micro contrast. In addition the better the light quality the more I can push my images in post, and for me everything from what I do with the camera to what I do in post is connected. It's unfortunate that the main stream media has projected the impression that post processing is just for correcting mistakes, instead of post just being a normal part of the the photographic process. You have to develop your "film" and it doesn't matter if the negative is a piece of celluloid or a RAW file.

Light is the one area where I've really hit a hard wall. Due to my style of shooting I have to use Canon's MT-24EX because it's the only flash that gives me the balance I need for hand holding the camera while chasing semi-active to hyperactive subjects. I also benefit from the close working distances at life size and higher magnification since the diffusion of the light gets better the closer the diffuser is to the subject, and getting the flash close also helps to keep the duration of the light as short as possible so that I can freeze a lot of motion. But the short distance between flash and subject limits what I can do to diffuse the flash, and I've pretty much taken the MT-24EX as far as it can go.


Sadly the MT-24EX is the only Canon flash that has not been updated, and I'm hoping that they do in fact come out with a better version of it.

My macro journey isn't over and if I can come up with something unique I'll post some abstract work this winter. Just wanted to let you know that I'm still here, but just finding inspiration a little difficult at the moment.

Monday, June 13, 2016

Published in the July issue of Digital SLR Photography Magazine

Mason Bee Series 1-3
I maintain several galleries, and although I've had a 500px gallery for quite a while I wasn't keeping it up to date. Just too many places to post an image to already. But after one of the editors gave me an editor's choice award for one of my photos I decided that I'd push some more images up to the site. While I was uploading photos one of the editors for Digital SLR Photography Magazine contacted me about publishing four of my images in the Portfolio section of the magazine. Three of the images would appear on a page with a short paragraph to describe them, and then a fourth photo would be printed full page (the image of a Mason Bee in the upper right hand side of this post). At roughly the same time that I was working on the text for the images my 500px gallery took off, and I'm not sure why. But over a weekend I had over two thousand new followers and it's been growing by over three hundred a day. As of this post there are over 13,500 people following my work at 500px!

Special thanks to Mr. Jordan Butters, contributing editor for Digital SLR Photography Magazine, for such a great opportunity!

Update 10 July 2016: I've passed the 25 thousand followers mark at 500px :)

Monday, May 16, 2016

Products that work: Eyelead Camera Sensor Cleaning Kit

I don't do reviews because there are plenty of sites out there that do and I have no intention of competing with them. I also do not want vendors sending me kit for a favorable review (happens more often than you know). But I do want to pass along the things that I've used that have worked really well and for sensor cleaning I haven't found anything better than the Eyelead Camera Sensor Cleaning Kit. No links that line my pocket with your money -if you want to know more then off to the Google with you. I will leave you with a video that was done my The Fstoppers:

Thursday, May 12, 2016

500px

Get My Good Side
I'm not sure why, but just today over two hundred people have started following me at 500px. Update: Since I wrote the original post less than two days ago over a thousand additional people are now following me and I still have no idea why.

To all of my new followers "Welcome!" and I hope you enjoy my work :)

Monday, May 9, 2016

Nesting Miner Bee Deconstruction

Nesting Miner Bee
Miner Bees get their name from their nesting habits. They build tunnels underground, usually in sandy soil, with tunnels branching off of the main entrance where the females make egg chambers. I've seen images of them emerging from their nests but I've never been lucky enough to take my own photos of it. That changed today when I spotted a female Miner Bee dive straight down to the ground right in front of me while I was out in the yard with my camera. The area where she was nesting was in the sun and I needed to cut all of the natural light out so I could use the flash as the only light source to help freeze motion. So I set up a large flower pot close to the hole to give me some shade, laid down on the ground with the camera ready, and waited. As she popped her head up the image above popped into my head but I wasn't at an angle where I could get it. I'd re-position only to spook her into going back into the nest. Eventually she got use to me and I had to act quickly to take the shot. Once any nesting bee gets acclimated to me they won't site still for long, and in fact she took off not long after I took the photo.

The Butcher's Bill

I spent about 36 minutes shooting the Miner Bee and took 85 frames. I have a few images that I might post later, but none as good as the one with this post. Sometime when I'm shooting it feels like fun, but this time she made me work for the shot I wanted :)

Sunday, May 1, 2016

Using Canon's 80D for Macro Photography

I keep getting asked about the Canon 80D and how I like using it for macro photography. My canned answer is that the dynamic range is better, the ISO noise is lower, and that the shutter is quieter -and all of that is true. But I don't know if most people understand what that increase in dynamic range can do for you, and how well it applies to some of the subjects that a macro photographer typically shoots. For a really good demonstration of the Canon 80D's dynamic range check out this review, the entire video is good but the first eight minutes or so is dedicated to discussing the dynamic range.


So how does this apply to macro and the types of critters that we shoot? Some surfaces, like a solitary bee's compound eye, are incredibly difficult to expose because it's like firing a flash directly into a curved piece of glossy black plexiglass. If you expose the scene "to the right" (exposing for the highlights) then the specular area in the bee's eye is going to be completely blown out unless the size of your diffuser relative to the subject is huge. Well now it's possible to get a break in the specular highlights on those surfaces by under exposing a scene and then boosting the exposure and shadows in post to recover detail that would have been lost in the shadows (without getting a lot of sensor noise and a serious loss in detail). You can easily see it in the video above. For those of you who photograph the small world this shot might be of interest to you:


My son found that Violet Carpenter bee comatose on the outside stairs that lead to a store room and an outdoor shower that we use in the summer time to wash sand off before going in the house. Since it's several meters below ground there is a temperature drop at the bottom and the critter fell victim to it. It's still alive, but covered in beach sand and hasn't had a chance to wake up and clean itself off. Not a shot that I'll post to my gallery, but I thought it would be a good test of the 80D's dynamic range so I shot it at about -2.5 EV (as measured in the camera's histogram looking at the red channel). I then brought it up +2/3 of a stop in post, boosted the shadows, and dropped the highlights down a little. I use Photoshop Elements 14, and I think that those of you who use Lightroom could do an even better job of adjusting the exposure curve. I then processed the shot the way that I do all of my photos. If it wasn't for the dirt on the critter's face that would be a perfectly usable image, and the compound eyes are clearly visible even in the "harshest" specular area. Now under exposing a scene isn't going to help you as much on the specular highlights if your light source isn't properly diffused to begin with but for those tricky subjects, with a properly diffused flash, under exposing is now an option if you're shooting with the Canon 80D. Highlight tone priority is also very practical now, and I think that I'll use it more often. In the past I always tried to expose to the right of the histogram but would lean toward under exposing a little, because I didn't want to risk losing detail in the highlights, and then I'd wrestle with sensor noise in post. Now I can be even more cautious where the highlights are concerned and still get a shot with very little noise and a lot of detail.

All of that is old news to anyone who doesn't shoot with a Canon camera, but then again you don't have the MP-E 65mm macro lens ;)

Tuesday, April 19, 2016

Mason Bee Life Cycle

I'd like to be able to say that I planned it, that from the beginning of this year my goal was to photograph the life cycle and behavior of Mason Bees. But I didn't, it just kinda happened. I did plan to photograph them, just didn't think I'd do as well as I did since their life spans are so short and the weather so unpredictable in the early spring. But I did manage to document them being born...

Hatching Female Mason Bee II

Hatching Female Mason Bee

...to starting a family...

Mating Red Mason Bees

...to nesting and nest building...

Protective Mom

Mason Bee Collecting Mud

Almost Finished II

...and I watched about twelve capped reeds of Mason Bees turn into over sixty in just two months. Next year I'm going to have a lot of bees! I even got lucky enough to photograph some Male Blue Mason bees on their birth day, a species that I hadn't seen in my yard before.

Newborn Blue Mason Bee I

If you want to know more about Mason Bees, and possible start raising them yourself, then head on over to Crown Bees. I'll leave you with this video I shot of Mason bees collecting mud for their nest building. I was right on top of them and not once did any of the ladies bother me -they really are quite docile and excellent pollinators!