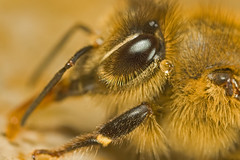
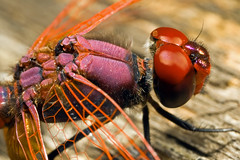
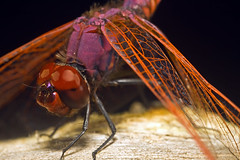
Every year there is an international bazaar at the NATO base here in Naples, Italy and this year two other photographers and I got together to split the price of a booth so we could sell photos. It was my first time trying to sell my work (outside of the local art shop here in town) and it went really well! I didn't make a lot of money -truth be told I probably only cleared fifty Euro (about 70 USD) after paying my share of the booth and my printing costs. But I made a lot of contacts and got some very valuable feedback on images.
I didn't think my dragonflies would be popular, but they were!
I sold two loose, 20x30 centimeter prints of the dragonfly in this post, and there was even a lot of interest in my life size and higher magnification images. The coolest part of the whole experience came on the second day when the manager of the base Exchange walked up to use and asked why were weren't selling prints at her store!
In addition to the dragonfly I sold a few abstracts and even a scenic of Vesuvius. Plus I picked up some great advice from a more seasoned photographer who's been selling prints for a while. So all in all it was an excellent learning experience and I want to do it again! :)
Footnote: A special "thanks!" to my wife who helped me get organized and who worked at the booth setting up and selling my images!
Sunday, October 21, 2007
Thursday, October 18, 2007
Busy as a...
Sorry about the lack of updates to the blog -I've been swamped. There is an international bazaar in town and I'm setting up a table to sell a few photos and getting ready for it, while juggling everything else (the day job, the family, etc.), has kept me pretty busy lately. I should have a few posts going up next week, and one of them will be my experimenting at seven times life size.
Saturday, October 6, 2007
Painting with Light series 1
It rained today and I was bored, so I broke out a 3 watt LED light that I bought just to experiment with. I wanted to see if the light would be bright enough to allow me to take abstract images without using a flash. The only thing I don’t like about doing abstracts with a flash is that I never know what I’m going to get until after I’ve taken the shot, since all of the light is coming from the flash itself. With the LED light I was hoping that I’d be able to see what I’d get before pressing the shutter release, but I ran into a problem.
I’d see this really incredible pattern reflected off of the DVD that I was pumping light into, but when I looked through the camera the pattern wasn’t there. It took me a minute to realize that the effect I saw reflected off of the disk depended on my distance to it, and I could change the effect by keeping the camera still and just changing the distance between the light and the DVD. The image attached to this post, and the rest of the photos in the Painting with Light series 1-1 to 1-7 are the end result of my rainy day experimenting.
I’d see this really incredible pattern reflected off of the DVD that I was pumping light into, but when I looked through the camera the pattern wasn’t there. It took me a minute to realize that the effect I saw reflected off of the disk depended on my distance to it, and I could change the effect by keeping the camera still and just changing the distance between the light and the DVD. The image attached to this post, and the rest of the photos in the Painting with Light series 1-1 to 1-7 are the end result of my rainy day experimenting.
Friday, October 5, 2007
Minimizing Reflections
I’ve spent the last month experimenting with different ways to mount the flash heads on my MT-24EX to minimize reflection. I like to use one flash head for fill, and the other as a direct light to bring out the detail in the critter that I’m photographing. Placing both flash heads close to each other at the top of the lens makes it easier to reduce reflections and to determine which one is causing problems if an area of the image is blown out.
What I found during all my trial and error was that it’s best to point the fill flash head toward the area where the subject would be, and then turn the flash head away from the lens “one click” –the MT-24EX’s flash heads can rotate a little and there are stops that you can feel as you turn them. So the fill flash is still pointed down, but not toward the subject.
The flash head I use to directly illuminate the subject can be pointed directly at the critter I’m photographing, but I sometimes have to point it down “one click” to avoid reflections from it. The down side to using the flash heads that way is that sometimes the resulting image is a little under exposed, but usually by no more than 2/3 of a stop –easy to correct for in post processing.
The image with this post is an example of what I’ve been able to do with the MT-24EX. There are some hot spots on the nose, but nothing that’s completely blown out.
When shooting close to life size sunlight reflecting off of shiny areas can be a problem as well, so pay attention to any hot spots that you see in the view finder. Eliminating them can be as simple as shifting your position no more than a few millimeters.
Wednesday, October 3, 2007
Novoflex Flash Arm
Recently I ordered this Novoflex flash arm hoping that I could use it to support the flash head that I use for fill (see this post for details). The flash arm itself didn’t work out for what I wanted to do, but the ball head did since it detaches and has a quick release plate for the MT-24EX. So I’ve been mounting it to my Really Right Stuff flash bracket and using the ball head so I can position the flash head closer to the subject. The photo included in this post is one of many that I’ve taken with the ball head and I’m pleased with the results. The only down side is that the ball head does not mount flush against the RRS flash bracket, so I’m looking for something to act as a spacer.
Instead of buying the flash arm to get the ball head the Novoflex Neiger 19P Mini Ball Head should also work equally well and it’s about $55 cheaper. But at $40 it’s still pretty expensive...
Once I get everything ironed out I’ll post an updated photo of my macro rig and list all sources for the parts.
Subscribe to:
Comments (Atom)


