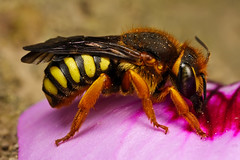
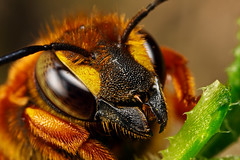
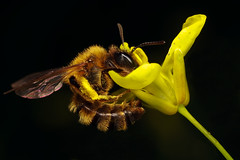
Given the choice I'd much rather shoot active subjects because the resulting images, if I can get them, tell a story. But some critters are just too skittish to photograph when they're active, like this solitary bee (looks like a hornet but it's not). I have some ethical issues with refrigerating or freezing subjects (unless you're taking a large number of frames for a focus stack chilling a subject is lame ) so the only choice left is to shoot early in the morning on the way to work before the critters have a chance to wake up. Fortunately I found this bee snoozing and took advantage of it for a few shots.
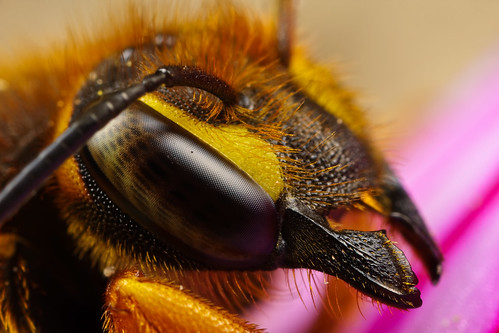
The setup is simple: I took a flower petal and placed it on the top of a stone wall close to where I found the bee. I then got the critter to climb onto my finger and I placed it on the flower petal. Most solitary bees are not aggressive, and due to its size I'm pretty sure that this one is male and has no stinger anyway. Of course I moved slowly and I tried to be as non threatening as I could. Once I had the bee in place all I had to do was put my left hand under the lens and then rest that hand against the wall to brace the camera. Studio conditions at the edge of a parking lot. Here's one of the portraits that I took at 4x and F10:
Again I really consider this type of shooting to be some of the easiest that I do because I've got full control of the scene and plenty of time to nail the composition and focus. Weather permitting I'll be back to shooting bees actively feeding in clover between 1x and 2x soon -just don't ask me about the "keeper rate"... ;)
Tuesday, April 28, 2009
Friday, April 24, 2009
Diffraction and Macro Motion Blur
This is, I hope, going to be a discussion about diffraction and how the effects of motion blur can be mistaken for it. But before I dive in I need to make a few things clear:
Please do not give me links to your examples of diffraction limited photos -I know that diffraction exists so there is no need to prove it...
Please read this entire post carefully, and with an open mind, before you post a comment...
When I first got into macro three years ago there were two prevailing themes: You had to use a tripod to get sharp images, and diffraction is the primary reason why you can't stop a lens down and get sharp images. I wanted to let the subject dictate how I shot it, and to go after moving targets, so I came up with the Left Hand Brace Technique for taking control of the motion in a scene so I could get the compositions and sharpness that I was looking for without using a tripod. Along the way I started to realize that what a lot of people were calling diffraction was really nothing more than a form of motion blur that I call macro motion blur. To explain how motion blur can mimic diffraction you first have to really understand what diffraction is.
The classic definition of diffraction is light bending as it passes through a small opening, and that's true. But there's a little more to it than that: The rays of light actually expand, like a cone, so that light rays that should hit a single pixel are now bleeding over into adjacent pixels. When that bleeding over reaches half way into those adjacent pixels you'll see a loss in image quality -diffraction has taken your lunch money.
But if you can wrap your head around expanding light rays causing a loss of detail then couldn't motion blur, as little as half a pixel of movement during the exposure, look like diffraction? My experience has taught me that it can.
Right about now some of you are thinking "But wait a minute Mr. Macro Motion Blur, why do my images get sharper when I decrease my Fstop?!" To answer that question we have to first determine what your real shutter speed is. At macro magnification, high Fstops, and low ISOs, the light that your flash is producing is the only significant light source in a scene. To prove it just set your camera to manual mode, F11, 1/200 of a second (or whatever your maximum flash sync speed is for your camera), ISO 100, and go out and take a photo on a bright sunny day with your macro lens set to its minimum focusing distance (life size magnification). You'll have to shoot something white or yellow to get anything to show up in the resulting image. Then turn on your flash and take the same shot -there will be a major difference in what you can see in the photo. At higher magnifications, with the flash turned off, you'll just get a completely black image. So your flash duration is really your shutter speed, since it's the major, or only, light source -the actual speed of the shutter doesn't matter...
So you set your camera to manual mode, F11, 1/200, and ISO 100. You've got a rig that will let you shoot at 2x, you take a shot hand held, and the resulting photo isn't very sharp. You then set your camera to F8, take the same shot, and this time the image is a lot sharper. See, no more diffraction! Well there's only one little problem -when you went from F11 to F8 you opened up the aperture in your lens to let twice as much light into the camera. Through The Lens (TTL) metering compensated for the increase in aperture (decreasing Fstop) by turning the flash on half as long -so your shutter speed (the flash) doubled. Did you defeat diffraction or macro motion blur?...
For me the answer is simple, since I can get sharp images at life size to three times life size at F13, and four to five times life size at F10 with Canon's MPE-65mm macro lens. The key is to get the flash as close to the subject as possible, use a diffuser that really diffuses the light (not one that just blocks the light), and look for ways to take control of the motion in the scene. Diffraction does exist, but it's not the bogyman that most people make it out to be...
Monday, April 20, 2009
Smoke and Mirrors
Another post that's part image deconstruction and part technique -I think I'm gonna get into the habit of combining the two from now on since it's easier to explain the techniques by breaking down an image as an example. This shots gonna be fun cause it's totally staged.
Yup, you heard me -staged...
It was late in the day, the sun had fallen over the rim of a volcanic crater that I was shooting next to (my favorite abandoned lot) and the Ladybugs were moving slow. So it was pretty easy to approach them but they kept falling onto the ground ever time I grabbed onto the grass stems they were climbing on (had to grab on to keep the scene steady and get the angles that I wanted). I'm not sure if they were having a tough time holding on because of the temperature, or if it's a defense mechanism that kicks in when they feel threatened -drop to the ground to get away from the jerk with the camera. Either way it was pretty frustrating to line up for a shot only to watch the critter fall down and get lost in all the grass.
I really wanted to go home with a few shots since I don't have many images of these critters in my gallery and later on in the year they'll either be too active to photograph or nonexistent. So I held my hand under one of them and caught it when it fell off of its perch and placed it on that daisy (at least that's what I think it is -I'm terrible at identifying the smelly things. To me it's just a backdrop anyway ;) ). I waited for the Ladybug to settle down and when it stopped moving I grabbed onto the stem of the flower with my left hand, used the Left Hand Brace Technique to take the shot, and presto -I've got a studio quality photo even though I'm sitting in an abandoned lot playing with bugs :)
Smoke and mirrors folks, smoke and mirrors...
Friday, April 17, 2009
Difficulty and Deception
This post is going to be part image deconstruction and part lesson in technique. It's also going to prove that I'd make a terrible magician since I'm giving away my secrets ;)
Let's start out with a shot of a Cuckoo Bee taken at five times life size, F10, and ISO 100:
What if I told you that taking an image like that one, hand held, is easy? Here's the setup: I found this bee on a cool, partly cloudy, day when it was just starting to get active. Since the temps and light were low it was really lethargic -so slow that I was able to cut the plant it was on with a small pair of scissors that I carry in my camera bag and move it to a shaded area on top of a stone wall (to keep it from warming up and flying off). I then clamped the stem of the plant into a small wood clamp that I also carry in my bag and I've got an instant studio. I simply rotated the plant to get the angles that I wanted and rested my arms against the wall to keep everything steady. Granted I had to nail the composition and the focus, but it's really just a matter of practice...
Same critter, but this time at 3x, F13, and ISO 100:
Notice how the background isn't black? That's because I've got the critter as close to the surface of the stone wall as I can and I'm shooting from an angle that allows me to illuminate the wall with the flash -there is no natural light in that scene. Easy to do because I'm in full control of the frame and how the elements in it are arranged. Seriously once you get past the mechanics and understand how things work then an image like that one isn't difficult -it only looks hard due to the magnification.
In contrast here's a shot at life size, F13:, and ISO 100
The background is black because it has to be: I'm shooting in an unkempt flower bed that's less than half a meter wide. The wall behind the bee is dirty and too far away to be illuminated by the flash. I could crank up the ISO or even lower the shutter speed to get some ambient light into the scene (it's almost noon on a cloudless day) but there's one little problem -the bee is hyper active. Even though it doesn't take me long to focus and shoot this little guy gave me all of three frames and he was in constant motion. The only way I could get a sharp image is to take full control of the light and freeze the motion in the scene with the short duration of the flash -to literally use the flash as my shutter. If the flash didn't fire then the only image I'd have is a little bit of that yellow flower (the bee would have been a silhouette).
The same principals hold true for this shot of a honeybee at life size, F13, and ISO 100:
The flower in the background? Well I saw it in the view finder and framed the scene to get it, but the fact that it shows up in the image is luck. It just happened to be close enough to be lit by the flash. Of the four images in this post the last two were the hardest to take since the critters in both of them are in motion.
Footnote: I intentionally left out the shutter speeds that I used for those images because the shutter only effects the amount of ambient light that makes it to the image plane and it has no effect on the flash (as long as you're shooting at or below your camera's flash sync speed). The point that I'm trying to make by not including the shutter speed is that it doesn't matter when shooting at macro magnification and high Fstops -there just isn't enough natural light making its way into the lens to have a major effect on what the camera records. Also by shooting at high Fstops and ISO 100 I'm intentionally trying to eliminate the ambient light in the scene so I can take full control of the light with the flash. So when you look at my images you're really viewing a form of stop motion photography where I'm freezing the motion in the scene with a short duration flash pulse -and now you know the secret to my sharp images... ;)
Thursday, April 16, 2009
How cool is that?!
I was pretty stunned today when I went to Digg.com and saw one of my photos on the first page. How cool is that?! :D
Subscribe to:
Posts (Atom)