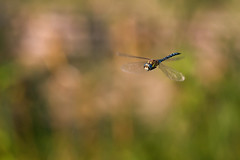
Given the choice I’d much rather shoot dragonflies on the ground, but there are some species that always seem to be in motion when I’m out with the camera. After a few attempts at shooting them in flight, and a lot of trial and error, I found a way to take shots of airborne dragons that seems to work pretty well –at least for me ;) Hopefully there will be something in this tutorial that you can use or adapt to your own style of shooting.
I don’t have a high end camera so my 40D only has nine auto focus points. Since I’m into composing with the view finder and will not allow myself to crop there never seems to be a usable auto focus point –the critter is rarely under one of them and the camera is much more likely to lock onto the background. So with the auto focus turned off on a 250mm macro lens (the 180mm L + a 1.4x teleconverter) I set the focus ring on my lens somewhere between the 2 and 5 meter mark –the critter is going to have to be close otherwise it’s going to look too small in the frame. I have the phrase “Clockwise gets close” stuck in my head, since turning the focus ring clockwise will bring the focus point toward me…
I set the camera to manual mode and either F5.6 to F11 depending on how much natural light is in the scene. I want to keep my shutter speed at or higher than 1/640 of a second since I’m hand holding a long lens (forget the 1/focal length rule for this type of shooting –it doesn’t work) and while looking through the lens in the general area where I expect to take the photo I want to see that the light meter is hovering around the -1 EC mark. I’ll adjust the ISO as necessary, but it’s pretty common for me to shoot natural light close-ups at ISO 400. NoiseWare Professional is extremely good at removing sensor noise and preserving detail, and for this type of shot I don’t need to see every lens in the dragon’s compound eye anyway.
Lately I’ve been using a 580EX II camera mounted with a 1/8” grid (to keep from throwing light everywhere) and with a ¼ CTO gel (to warm up the light from the flash). Since I’ve got an 81A warming filter on the lens I can turn what would be a rather harshly lit scene into one that looks more like it was shot in the early morning or late evening. Adjusting the white balance in post does not have the same effect, but if you don’t want to use the warming filter then you might not want to use the CTO either. In post you’ll have two completely different light sources (harsh ambient and warm flash) and there won’t be much that you can do to fix it.
I have the flash in E-TTL mode without any flash exposure compensation and it seems to work really well for subjects that are at least one meter from the front of the lens. Closer than a meter and I’m usually at -1 FEC or more. The reason for using the flash is simple: In post I’m going to raise the exposure and the gridded flash causes the subject to be exposed at a slightly higher level than the background. When I raise the exposure I can keep the background darker relative to the subject and it makes the dragonfly “pop” off of the page. I can also keep the background under exposed a little to keep the colors saturated –so that mid day sun doesn’t look like mid day sun…
Now all I have to do is wait for the dragonfly to get within range and hover, and I can usually tell where to stand by watching its feeding habits. Most insects are creatures of habit and dragonflies are no exception –they’ll get into a pattern of stopping in certain places. Once the critter hovers I quickly course focus the lens by turning the focus rind and then fine tune the focus by slighting moving my body back and forth. I refocus for every shot and I take, and delete, a lot of frames…
In post I raise the exposure, bump the contrast, sharpen the image with Focus Magic (easier to use than USM –less of a chance that I’m going to over sharpen the photo), run NoiseWare to remove sensor noise, adjust the levels to set a black point, add my copyright info to the EXIF data and save the image.


2 comments:
great. i read your blog and learn from it, still cant master it. learning slowly.
here is my try http://www.flickr.com/photos/shoken/2943753881/
Practice, lots and lots of practice. You're doing very well!
Post a Comment