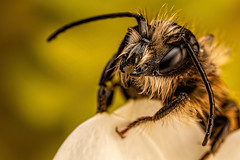
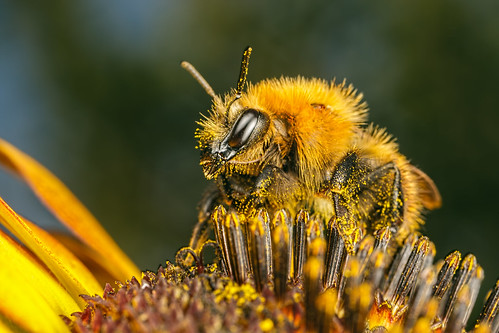
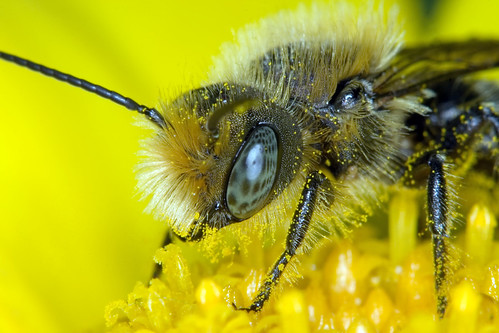
I took a long break from shooting macro, and during that time I didn't even keep up with macro forums. When I decided to start shooting again I decided to see what people were posting about macro and I was really surprised. The Internet seems to be mankind's greatest invention for the dissemination of misinformation. Lots of people just repeating what they've read, and quite a few who were writing as if they were a subject matter expert when they didn't even have a single image in their online gallery that was at 1x or higher magnification. Some of the same bad advice that that cost me a lot of time, money, and frustration when I first started shooting macro. Here's the list, in no particular order.
#1 The "bug lens" myth. Some people say that long focal length lenses are best for shooting insects (a "bug lens"). That one really took me back, cause I know a lot of macro photographers that shoot active subjects with short focal length lenses (I'm one of them). In fact if you want to use a flash as the primary light source then a short focal length, in the 60mm range, is optimal. You need to get the flash as close to the subject as possible to keep the duration of the flash to a minimum, and getting the flash close also gives you better diffusion (both explained in more detail later). So you really need to learn the habits and quirks of the subjects that you want to shoot because it's your knowledge of them, and their willingness to let you get close, that will determine if you get the shot. To a skittish critter the working distance of a lens doesn't matter, so there is no such thing as a "bug lens".
#2 The focus stacking myth. Still a lot of people claiming that you have to focus stack to get enough depth for macro. But most of them are really saying that in order to get razor sharp images that have some depth you have to focus stack (and that's actually true). The kind of detail that a focus stacked image will give you is almost lost on the web and in print, and the average person doesn't care about absolute image sharpness because they're looking for something to save to their computer desktop (or their phone's screen) as wallpaper. People who don't pixel peep want images that look good edge to edge, and you don't need to focus stack to create images that have a lot of depth and detail. You do need to look for, or learn to create, magic angles (angles that make the most out of the depth in a single frame). But the myth persists because some people can't see the picture because the pixels are in the way...
#3 The diopter myth. Plenty of people saying that adding any additional glass to a lens will degrade image quality. I'd preface that statement that if you add cheap glass to a lens then you're going to see a loss of detail, and maybe a lot of other artifacts as well. But most high quality diopters (close up lenses), or even teleconverters won't have a huge impact on image quality. You have to pixel peep to notice any difference. If you need to use additional glass to get a shot then use it -it's better than no photo at all...
#4 The 100mm macro lens myth. Macro lenses in the 100mm range are not good beginner lenses. I'm guilty of this one, cause I use to recommend them for people just getting into the discipline. But the best lens for a beginner is also the best lens for someone who has some experience, and the lens you need depends on the light source. A macro lens in the 60mm range is best when a flash will be the primary light source since you need to get the flash close to the subject to keep the flash duration to a minimum (easier to freeze motion) and the closer the flash the better the diffusion. If you want to use natural light as the primary light source then get a long focal length macro lens, the longer the better. You'll need the extra working distance to keep from shading the subject, or disturbing it. Macro lenses in the 100mm range are a jack of all trades, but a master of none. Too much working distance for flash, and for natural light you'll want more room between the lens and the subject. A lot of the issues I struggled with when I first got into macro were due to using Canon's 100mm USM macro lens.
#5 The flash duration myth. The general perception that the flash will always fire fast enough to freeze motion, and as proof people will list duration times that are close to what a flash will produce when set close to minimum power. The problem with shooting macro is that there is very little surface area to reflect light back into the lens, so you'll rarely if ever be using a flash at close to its minimum setting. Compound that with motion as little as 1/4 the width of a pixel being enough to amplify diffraction, an effect I call macro motion blur. Macro motion blur won't look like traditional motion blur, but you will see a loss of detail and it's easy to blame it on diffraction alone. Although not as obvious as stopping a balloon in mid pop, or a bullet as it passes through an apple, flash based macro is a form of flash based stop motion photography. The "secret" to getting sharp images at high Fstops and magnification is to take as much control over the motion in the scene as possible (your motion and the subject), get the flash as close to the subject as possible (to keep the duration of the flash to a minimum), and use a diffuser that actually forces the light to spread out (and not just block the light). Diffraction, lens sharpness, and motion all have a very synergistic effect on each other with the end result being a loss in image detail. Unfortunately there are still a lot of people who claim that any loss of detail when shooting at high magnification and Fstops is just due to diffraction, and it's just not true.
That's my list for now. I'll add to it when and if I see more "armchair expert advice". What macro myths have you run into?
Tuesday, June 11, 2019
Wednesday, June 5, 2019
Macro Technique
When people discus macro technique there are pretty much two groups. Some people buy a tripod and a focusing rail and then go looking for something that will sit still long enough so that they have time to set everything up for a photo. Nothing wrong with it, but choosing your gear and then looking for something that will let you take a shot is going to limit what you can photograph and when. Odds are you're gonna shoot a lot of dew covered critters, or you'll go looking for something that's dead. In short the more gear you use the more redistricted you'll be. The same holds true for technique: There's nothing inherently wrong with focus stacking, but like using a tripod it will limit what you can photograph.
Then there is the other group: A lot of people (myself included) shoot hand held with just a camera, flash, and a macro lens. Keeping the gear to a minimum allows the subject to dictate how it's going to be photographed. If you take the time to study the habits and quirks of the critters you want to photograph then you can get the images that you want, in just about any conditions. The only thing that stops me is the rain, but after a storm is the perfect time to go looking for a subject that's been slowed down by the rain and the drop in temperature that normally comes with it.
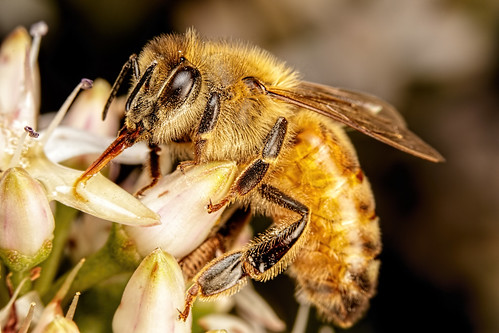
Another advantage to shooting hand held is that you can shoot hyperactive subjects when it's windy. Insects can't tell the difference in the vibration induced by the wind, and the vibration induced by me when I grab on to the stem of a flower. Once I have the stem in my left hand I rest the lens on that same hand to keep everything steady. If I managed to get set up without spooking the subject then all I have to do is follow it with the camera and wait for something interesting to happen. Like this female Sweat Bee using her mandibles to anchor herself to a stamen while she attempts to collect pollen.
Using your left hand to hold on to the critter's perch, and then resting the lens on that same hand to keep everything steady, is a technique that I call the Left Hand Brace. The biggest advantage to using it is that it allows me to photograph insects going about their routine. Like this Chafer Beetle that was shoveling pollen into its mouth.
It's also possible, under the right conditions, to photograph the same subject twice and end up with a completely different set of images. I found this semi-active Mason Bee in my Lavender and moved it to my patio table so I could sit down and photograph it with an artificial flower in the background (to keep the background from being black). It would move around and when it stopped I'd look for a way to compose it.
After a while I got tired and decided to crash for a while, so I set the bee on a flower close to my patio. The weather was partly cloudy and cool, with intermittent light rain so the critter stayed on the flower. When I went to check on it this is how I found it.
Same day, same subject, completely different images. The point is to keep your mind open and look for opportunities even when conditions don't seem to be ideal. I've had the chance to shoot some really cool subjects on days when most people would probably leave their camera in their camera bag.
Another way to get close to a critter that doesn't want you anywhere near it is to use a syringe to inject sugar syrup into a flower. If the subject is more hungry then afraid the syrup gives it a reason to let you get close.
There's also a potential third group that combines parts of the first two, using whatever gear and techniques fit the situation. The main thing is to use whatever it takes to get a scene that's in your head and get it into the camera. But I draw the line at putting critters in a refrigerator to slow them down (they might die), or killing them. It's my opinion that macro photographers have a responsibility to change hearts and minds about the small world, and it's kinda tough for the general public to take insects seriously if macro photographers are killing them just to take a photo. They have to be seen as more than "just bugs"...
That's all for this article folks. Until next time happy shooting!
Then there is the other group: A lot of people (myself included) shoot hand held with just a camera, flash, and a macro lens. Keeping the gear to a minimum allows the subject to dictate how it's going to be photographed. If you take the time to study the habits and quirks of the critters you want to photograph then you can get the images that you want, in just about any conditions. The only thing that stops me is the rain, but after a storm is the perfect time to go looking for a subject that's been slowed down by the rain and the drop in temperature that normally comes with it.
Another advantage to shooting hand held is that you can shoot hyperactive subjects when it's windy. Insects can't tell the difference in the vibration induced by the wind, and the vibration induced by me when I grab on to the stem of a flower. Once I have the stem in my left hand I rest the lens on that same hand to keep everything steady. If I managed to get set up without spooking the subject then all I have to do is follow it with the camera and wait for something interesting to happen. Like this female Sweat Bee using her mandibles to anchor herself to a stamen while she attempts to collect pollen.
Using your left hand to hold on to the critter's perch, and then resting the lens on that same hand to keep everything steady, is a technique that I call the Left Hand Brace. The biggest advantage to using it is that it allows me to photograph insects going about their routine. Like this Chafer Beetle that was shoveling pollen into its mouth.
It's also possible, under the right conditions, to photograph the same subject twice and end up with a completely different set of images. I found this semi-active Mason Bee in my Lavender and moved it to my patio table so I could sit down and photograph it with an artificial flower in the background (to keep the background from being black). It would move around and when it stopped I'd look for a way to compose it.
After a while I got tired and decided to crash for a while, so I set the bee on a flower close to my patio. The weather was partly cloudy and cool, with intermittent light rain so the critter stayed on the flower. When I went to check on it this is how I found it.
Same day, same subject, completely different images. The point is to keep your mind open and look for opportunities even when conditions don't seem to be ideal. I've had the chance to shoot some really cool subjects on days when most people would probably leave their camera in their camera bag.
Another way to get close to a critter that doesn't want you anywhere near it is to use a syringe to inject sugar syrup into a flower. If the subject is more hungry then afraid the syrup gives it a reason to let you get close.
There's also a potential third group that combines parts of the first two, using whatever gear and techniques fit the situation. The main thing is to use whatever it takes to get a scene that's in your head and get it into the camera. But I draw the line at putting critters in a refrigerator to slow them down (they might die), or killing them. It's my opinion that macro photographers have a responsibility to change hearts and minds about the small world, and it's kinda tough for the general public to take insects seriously if macro photographers are killing them just to take a photo. They have to be seen as more than "just bugs"...
That's all for this article folks. Until next time happy shooting!
Saturday, May 4, 2019
Back in the Saddle
After a break that lasted more than a year I decided to start shooting again. So far four of the images that I've posted to Flickr have hit their Explore page (without any manipulation from me) and I picked up an 11th Daily Deviation at Deviant Art. So far so good :)
I hope to get back to blogging more, and I've started reviewing my tutorials to make sure they're still relevant and to see if there's still more to write. I've also been posting to my Instagram account. If there's anything that you'd like for me to cover concerning macro photography just hit me up in the comments here or on Facebook. More to come :)
Sunday, January 21, 2018
Let's Talk About Light
I'm going to kick off this article with some "ground rules". I'm more interested in talking about light in terms of diffusion and flash eficiency, since both are going to have an impact on the amount of detail that can be captured in the subject. Even the angle of the light can make a difference in how much detail you'll see.
The funny thing about macro is that it seems to attract a lot of really intelligent people. Unfortunately most of them can't wrap their heads around anything that cannot be measured in a lab and successful tested. An example is that I like diffused light that looks "feathered". Do I know what that light looks like when I see it? Yup. Can I accurately describe it to you? It would be tough, especially since I don't feather my light by rotating the flash away from the subject. We're also not going to get into a discussion about the best way to diffuse a light source because it's too style dependent. I'd love to be able to use studio lights and huge soft boxes. Unfortunately it's a little tough to hand hold that kind of gear and chase after hyperactive subjects...
Note: The 1/focal length rule for determining the slowest shutter speed for hand holding a lens breaks down at 1x and higher magnification. You actually need much faster shutter speeds for shooting macro because motion as little as half the width of a pixel is enough to amplify diffraction. When shooting with the flash as your primary light source for the subject the duration of the flash becomes your "shutter speed". Although not as obvious as stopping a balloon in mid pop, or a bullet as it passes through an apple, flash based macro is a form of flash based stop motion photography. The more control you have over movement (yours and the subject) and the shorter the flash duration the sharper your images are going to be. A lot of the image softness that is blamed on diffraction is really just motion amplified diffraction, or what I like to call "macro motion blur". It won't look like traditional motion blur, but it will rob you of sharpness like diffraction does. The technique that I use to control motion and the way I diffuse my flash and get it close the subject are the reasons why I can capture a lot of detail even though I'm shooting with a lens stopped down to F11 or more.
Let's start off by looking at a common mistake that I see people making, especially people who are struggling with the bright spot in the specular highlights that a flash tube can make. I was speaking with a shooter several years back who had solved the hot spot problem by cutting a hole in a white opaque plastic cutting board and mounting it to the front of his lens. On the surface that might seem pretty good. No small central hot spot and light that looked pretty soft. But the guy who was using it to diffuse his flash for macro complained about slow flash recycle times and that his images seemed under exposed above 1x. The problem was that the cutting board was doing a better job of blocking the light than diffusing it, and his flash was firing close to or at full power most of the time. I think that a cutting board is a good example of a material that will diffuse a flash, but just because it can diffuse the light that doesn't mean that you should use it.
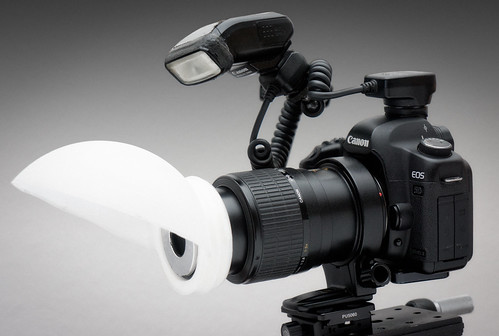
Lens mounted diffusers can be pretty effective, provide the flash is actually pointed toward the subject, is close to the diffuser, and not just camera mounted and firing straight ahead. Here's an excellent example of one made by John Hallmen, although it could use some improvements:
The general idea is to use the diffuser to shade the subject, so that the flash is the primary light source. You can then "walk the shutter" (decrease the shutter speed) to expose for the natural light in the background. One way to improve his design it to place something over the flash that will force any reflected light off of the back of the diffuser to go out the front. It would also prevent ambient light from coming though the diffuser (easier to make the flash the only light source on the subject). If you click on the image you'll get John's Flickr post with his list of pros and cons on using that diffuser. I have a lot of respect for Mr. Hallmen because he's one of the few people in the macro community that's willingly sharing his technique and experience.
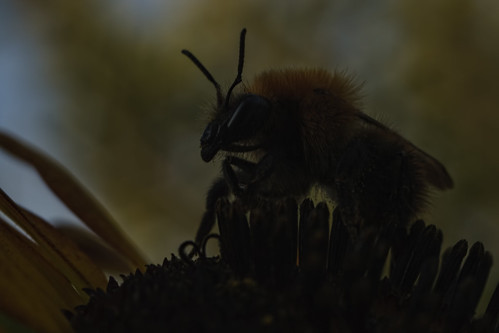
Here's an example of what I mean by using the flash as the primary light source on the subject:
While shooting that bee the flash didn't fire and you can see that the critter is almost a silhouette. I have the camera set to expose for the background (although a little under exposed). So I can use the flash to expose the subject and it's shorter than the shutter speed duration help to freeze motion.
A camera mounted flash, with a lens mounted diffuser, will work (example here) and the light will be feathered because the flash isn't pointed directly at the subject. But since the flash is firing straight ahead it's not very efficient and you might run into problems keeping your flash duration short enough to freeze motion.
Food grade plastics are another example of a potentially poor choice for flash diffusion. A food container might be blocking certain wavelengths of light to protect the product, and could cause problems with your light quality that can't be easily fixed in post. I was using some plastic from a liquide yogurt bottle a few years back that made my light way too warm.
Ring flashes -just say no. They are very convenient and easy to use. But the light will look flat because the flash heads are too parallel to the lens, and because a ring flash almost wraps completely around the lens. So even when using ratio control to make one flash head brighter than the other the resulting light can still look pretty flat. Here's an example of the light "quality" that I was getting with a Canon MR-14EX over 10 years ago.
For some of you the light in that image is gonna be acceptable, but for me it's not. Even with a 4:1 ratio difference between the two flash heads the light still looks flat, and the specular highlight is pretty ugly. I have seen some attempts at adding a diffuser to a ring flash, as well as trying to mount one by not connecting it to the end of a lens. But unless you're a dentist, who needs to photograph a patient's teeth, you're better off with any other light source.
This may be part one of this discussion depending on the questions and feedback that I get. Stay tuned ;)
The funny thing about macro is that it seems to attract a lot of really intelligent people. Unfortunately most of them can't wrap their heads around anything that cannot be measured in a lab and successful tested. An example is that I like diffused light that looks "feathered". Do I know what that light looks like when I see it? Yup. Can I accurately describe it to you? It would be tough, especially since I don't feather my light by rotating the flash away from the subject. We're also not going to get into a discussion about the best way to diffuse a light source because it's too style dependent. I'd love to be able to use studio lights and huge soft boxes. Unfortunately it's a little tough to hand hold that kind of gear and chase after hyperactive subjects...
Note: The 1/focal length rule for determining the slowest shutter speed for hand holding a lens breaks down at 1x and higher magnification. You actually need much faster shutter speeds for shooting macro because motion as little as half the width of a pixel is enough to amplify diffraction. When shooting with the flash as your primary light source for the subject the duration of the flash becomes your "shutter speed". Although not as obvious as stopping a balloon in mid pop, or a bullet as it passes through an apple, flash based macro is a form of flash based stop motion photography. The more control you have over movement (yours and the subject) and the shorter the flash duration the sharper your images are going to be. A lot of the image softness that is blamed on diffraction is really just motion amplified diffraction, or what I like to call "macro motion blur". It won't look like traditional motion blur, but it will rob you of sharpness like diffraction does. The technique that I use to control motion and the way I diffuse my flash and get it close the subject are the reasons why I can capture a lot of detail even though I'm shooting with a lens stopped down to F11 or more.
Let's start off by looking at a common mistake that I see people making, especially people who are struggling with the bright spot in the specular highlights that a flash tube can make. I was speaking with a shooter several years back who had solved the hot spot problem by cutting a hole in a white opaque plastic cutting board and mounting it to the front of his lens. On the surface that might seem pretty good. No small central hot spot and light that looked pretty soft. But the guy who was using it to diffuse his flash for macro complained about slow flash recycle times and that his images seemed under exposed above 1x. The problem was that the cutting board was doing a better job of blocking the light than diffusing it, and his flash was firing close to or at full power most of the time. I think that a cutting board is a good example of a material that will diffuse a flash, but just because it can diffuse the light that doesn't mean that you should use it.
Lens mounted diffusers can be pretty effective, provide the flash is actually pointed toward the subject, is close to the diffuser, and not just camera mounted and firing straight ahead. Here's an excellent example of one made by John Hallmen, although it could use some improvements:
The general idea is to use the diffuser to shade the subject, so that the flash is the primary light source. You can then "walk the shutter" (decrease the shutter speed) to expose for the natural light in the background. One way to improve his design it to place something over the flash that will force any reflected light off of the back of the diffuser to go out the front. It would also prevent ambient light from coming though the diffuser (easier to make the flash the only light source on the subject). If you click on the image you'll get John's Flickr post with his list of pros and cons on using that diffuser. I have a lot of respect for Mr. Hallmen because he's one of the few people in the macro community that's willingly sharing his technique and experience.
Here's an example of what I mean by using the flash as the primary light source on the subject:
While shooting that bee the flash didn't fire and you can see that the critter is almost a silhouette. I have the camera set to expose for the background (although a little under exposed). So I can use the flash to expose the subject and it's shorter than the shutter speed duration help to freeze motion.
A camera mounted flash, with a lens mounted diffuser, will work (example here) and the light will be feathered because the flash isn't pointed directly at the subject. But since the flash is firing straight ahead it's not very efficient and you might run into problems keeping your flash duration short enough to freeze motion.
Food grade plastics are another example of a potentially poor choice for flash diffusion. A food container might be blocking certain wavelengths of light to protect the product, and could cause problems with your light quality that can't be easily fixed in post. I was using some plastic from a liquide yogurt bottle a few years back that made my light way too warm.
Ring flashes -just say no. They are very convenient and easy to use. But the light will look flat because the flash heads are too parallel to the lens, and because a ring flash almost wraps completely around the lens. So even when using ratio control to make one flash head brighter than the other the resulting light can still look pretty flat. Here's an example of the light "quality" that I was getting with a Canon MR-14EX over 10 years ago.
For some of you the light in that image is gonna be acceptable, but for me it's not. Even with a 4:1 ratio difference between the two flash heads the light still looks flat, and the specular highlight is pretty ugly. I have seen some attempts at adding a diffuser to a ring flash, as well as trying to mount one by not connecting it to the end of a lens. But unless you're a dentist, who needs to photograph a patient's teeth, you're better off with any other light source.
This may be part one of this discussion depending on the questions and feedback that I get. Stay tuned ;)
Tuesday, January 2, 2018
The Facebook Effect
The more I post on forums the more I think I shouldn't. When I see people asking for comments and critique (C&C) I try to be fair, and honest, with my assessment of their work. But most of the time that's not what the person asking for C&C really wants -they just want to be "liked". They want me, and everyone else, to pat them on the back and tell them that they're doing great even when they're not. So I can either get on the "nice capture" train, macro's version of the like button, or say nothing at all. Heaven help me if I actually give someone honest advice! In the end all of the major discussion boards have pretty much degraded into circle jerks of mediocrity, with no one making any real improvement in their photography.
The more well known a photographer is, in any community, the more difficult it is to give them advice. They're addicted to the gratification that they get every time they post an image, not realizing that being well known is like a feedback amplifier and for every positive comment they give they're likely to get several in return. That's why they shouldn't listen to any of the positive comments. The moment that they do they're probably going to stop pushing themselves to improve, and they'll stop listening to jerks like me who are telling them where they need to make changes.
Even when people ask for equipment advice it's not genuine most of the time. What they really want is reassurance, because they've already decided to spend the money. But they'll go looking for someone, even an Internet stranger, to make them feel good about parting with the cash. I frequently make the mistake of looking at the person's gallery and telling them that they need to improve their composition, or lighting, or both and that new gear isn't going to help. But that's not the answer that they're looking for, and odds are the new kit is already on it's way or they had it before they even made a post asking for advice.
If you really want to improve your photography then you're going to have to learn how to subjectively critique your own work. It's OK to make mistakes, but you're going to have to figure out where you're going wrong. Odds are no one is going to help you see the errors you're making because they're afraid you'll stop making positive comments on their work if they do. So you'll have to pick your own work apart because everyone is just going to "like" you.
For some of you honest self evaluation is going to be tough due to all of the positive feedback that you're getting. But that feedback is like a birthday or Christmas present -the only reason that you're getting gifts is because you give them.
I though that the obsession with absolute image sharpness was killing macro, and to some degree it still is. But everyone's overwhelming need for approval might just put the final nail in the macro coffin...
The more well known a photographer is, in any community, the more difficult it is to give them advice. They're addicted to the gratification that they get every time they post an image, not realizing that being well known is like a feedback amplifier and for every positive comment they give they're likely to get several in return. That's why they shouldn't listen to any of the positive comments. The moment that they do they're probably going to stop pushing themselves to improve, and they'll stop listening to jerks like me who are telling them where they need to make changes.
Even when people ask for equipment advice it's not genuine most of the time. What they really want is reassurance, because they've already decided to spend the money. But they'll go looking for someone, even an Internet stranger, to make them feel good about parting with the cash. I frequently make the mistake of looking at the person's gallery and telling them that they need to improve their composition, or lighting, or both and that new gear isn't going to help. But that's not the answer that they're looking for, and odds are the new kit is already on it's way or they had it before they even made a post asking for advice.
If you really want to improve your photography then you're going to have to learn how to subjectively critique your own work. It's OK to make mistakes, but you're going to have to figure out where you're going wrong. Odds are no one is going to help you see the errors you're making because they're afraid you'll stop making positive comments on their work if they do. So you'll have to pick your own work apart because everyone is just going to "like" you.
For some of you honest self evaluation is going to be tough due to all of the positive feedback that you're getting. But that feedback is like a birthday or Christmas present -the only reason that you're getting gifts is because you give them.
I though that the obsession with absolute image sharpness was killing macro, and to some degree it still is. But everyone's overwhelming need for approval might just put the final nail in the macro coffin...
Monday, December 4, 2017
Canon MT-26EX-RT Diffusers
I spent the better part of yesterday afternoon becoming one with the universe, Legos, and a hot glue gun. The result is a diffuser set that stays together, but I can easily take it apart and swap out some of the diffusion material. Currently using the Canon supplied diffuser, two layers of 1/4 stop white silk, and a Gary Fong Puffer Plus. Also in the diffuser that I took apart to show you the guts there is a layer of 1/8 CTO gel.
The diffuser that Canon supplies with the flash is made of some really opaque plastic, and it's solid. The clips on the diffuser, and the larger/deeper indent on the flash heads, lock the diffuser in place really well and can support some weight. No need to hot glue the diffuser onto the flash heads like I had to do with the MT-24EX.
A few years ago I was watching a tutorial on Youtube and in it a portrait photographer was using layers of white silk until he got the diffusion that he wanted. I really like the effect, but the amount of space that I have to work with is pretty limited so I'm restricted to just two or three layers. There has to be a gap between the layers or the amount of light reduced by the silk seems to go up exponentially. Done right the light from the flash becomes "feathered" and looks really soft.
I use the Puffer Plus as a last stage for a couple of reasons. The outside surface is dimpled, so it has a lot more surface area than a flat piece of diffusion material. I can also use a larger section of it because it's curved. I use the heads in a key and fill arrangement, just like portrait lighting. So I need to be able to position the flash heads as close to 45 degrees apart as possible (key at the top with the fill off to one side). The 1/8 CTO gel is to make the light from the fill a little warm -really makes the subject "pop". Nearly all of the inspiration for my lighting comes from portrait photographers.
Here's a shot of both diffusers on the flash heads with the focusing lamps on. The brightness of the focusing lamps can be controlled in five increments, and this is with them set to level 4.
When my son was younger he gave me one of his Hot Wheels cars to use as a test target and I like using it due to the curved surfaces, windshield, and the gloss finish on the paint (although it has seen better days). Both images where taken with the Canon MP-E 65mm at 1x, so they represent the worse case in terms of light quality for me, since the diffusion only gets better as the distance between the subject and the diffusers gets shorter. Both images were shot in RAW with only minor changes in the RAW editor, and then converted to JPG.
With the bare flash:
With the new diffuser:
The diffuser that Canon supplies with the flash is made of some really opaque plastic, and it's solid. The clips on the diffuser, and the larger/deeper indent on the flash heads, lock the diffuser in place really well and can support some weight. No need to hot glue the diffuser onto the flash heads like I had to do with the MT-24EX.
A few years ago I was watching a tutorial on Youtube and in it a portrait photographer was using layers of white silk until he got the diffusion that he wanted. I really like the effect, but the amount of space that I have to work with is pretty limited so I'm restricted to just two or three layers. There has to be a gap between the layers or the amount of light reduced by the silk seems to go up exponentially. Done right the light from the flash becomes "feathered" and looks really soft.
I use the Puffer Plus as a last stage for a couple of reasons. The outside surface is dimpled, so it has a lot more surface area than a flat piece of diffusion material. I can also use a larger section of it because it's curved. I use the heads in a key and fill arrangement, just like portrait lighting. So I need to be able to position the flash heads as close to 45 degrees apart as possible (key at the top with the fill off to one side). The 1/8 CTO gel is to make the light from the fill a little warm -really makes the subject "pop". Nearly all of the inspiration for my lighting comes from portrait photographers.
Here's a shot of both diffusers on the flash heads with the focusing lamps on. The brightness of the focusing lamps can be controlled in five increments, and this is with them set to level 4.
When my son was younger he gave me one of his Hot Wheels cars to use as a test target and I like using it due to the curved surfaces, windshield, and the gloss finish on the paint (although it has seen better days). Both images where taken with the Canon MP-E 65mm at 1x, so they represent the worse case in terms of light quality for me, since the diffusion only gets better as the distance between the subject and the diffusers gets shorter. Both images were shot in RAW with only minor changes in the RAW editor, and then converted to JPG.
With the bare flash:
With the new diffuser:
Subscribe to:
Posts (Atom)